本篇将介绍Android中的协程
Material Design
Material Design - Navigation
Navigation导航跳转
在 Google I/O 2018 上新出现了一个导航组件(Navigation Architecture Component),导航组件类似iOS开发里的StoryBoard,可以可视化的编辑App页面的导航关系。
Navigation依赖
1 | implementation 'androidx.navigation:navigation-fragment-ktx:2.3.0' |
Navigation使用
先创建2个
Fragment,用于导航跳转FragmentA
1
2
3
4
5
6
7
8
9
10
11
12class FragmentA : Fragment() {
private val binding: FragmentABinding by lazy { FragmentABinding.inflate(layoutInflater) }
override fun onCreateView(
inflater: LayoutInflater,
container: ViewGroup?,
savedInstanceState: Bundle?
): View {
return binding.root
}
}布局
1
2
3
4
5
6
7
8
9
10
11
12
13
14<androidx.constraintlayout.widget.ConstraintLayout xmlns:android="http://schemas.android.com/apk/res/android"
android:layout_width="match_parent"
android:layout_height="match_parent"
xmlns:app="http://schemas.android.com/apk/res-auto">
<Button
android:id="@+id/button"
android:layout_width="wrap_content"
android:layout_height="wrap_content"
android:text="按钮"
app:layout_constraintLeft_toLeftOf="parent"
app:layout_constraintTop_toTopOf="parent" />
</androidx.constraintlayout.widget.ConstraintLayout>FragmentA里面也就只是放了个Button用于跳转FragmentB
1
2
3
4
5
6
7
8
9
10
11
12
13class FragmentB : Fragment() {
private val binding: FragmentBBinding by lazy { FragmentBBinding.inflate(layoutInflater) }
override fun onCreateView(
inflater: LayoutInflater,
container: ViewGroup?,
savedInstanceState: Bundle?
): View? {
return binding.root
}
}布局
1
2
3
4
5
6
7
8
9
10
11
12
13
14
15
16
17
18
19
20
21
22
23
24
25
26
27
28
29
30
31
32
33
34
35
36
37
38
39
40
41
42
43
44
45
46
47
48
49
50
51
52
<com.google.android.material.card.MaterialCardView xmlns:android="http://schemas.android.com/apk/res/android"
xmlns:app="http://schemas.android.com/apk/res-auto"
xmlns:tools="http://schemas.android.com/tools"
android:layout_width="match_parent"
android:layout_height="match_parent"
android:transitionName="fragmentB">
<androidx.constraintlayout.widget.ConstraintLayout
android:layout_width="match_parent"
android:layout_height="match_parent">
<TextView
android:id="@+id/med_title"
android:layout_width="match_parent"
android:layout_height="wrap_content"
android:layout_marginStart="10dp"
android:layout_marginTop="30dp"
android:textColor="@color/black"
android:textSize="20sp"
android:textStyle="bold"
app:layout_constraintLeft_toLeftOf="parent"
app:layout_constraintTop_toTopOf="parent"
tools:text="标题" />
<TextView
android:id="@+id/mad_author"
android:layout_width="wrap_content"
android:layout_height="wrap_content"
android:layout_marginEnd="10dp"
android:text="@string/ma_author"
android:textColor="@color/black"
android:textSize="15sp"
app:layout_constraintRight_toRightOf="parent"
app:layout_constraintTop_toBottomOf="@+id/med_title" />
<TextView
android:id="@+id/mad_text"
android:layout_width="match_parent"
android:layout_height="0dp"
android:layout_marginLeft="@dimen/dp_10"
android:layout_marginTop="10dp"
android:layout_marginRight="@dimen/dp_10"
android:text="@string/mad_text"
android:textColor="@color/black"
android:textSize="18sp"
app:layout_constraintBottom_toBottomOf="parent"
app:layout_constraintLeft_toLeftOf="parent"
app:layout_constraintTop_toBottomOf="@+id/mad_author" />
</androidx.constraintlayout.widget.ConstraintLayout>
</com.google.android.material.card.MaterialCardView>FragmentB这里就放了几个TextView。相当于是详情页,方便后面进行更改在
res文件下创建一个名为navigation的文件夹
在
navigation文件夹下在创建一个名为navigation_graph的xml文件创建完成之后,打开
navigation_graph在xml文件中点击右上角的Design切换页面

之后就可以通过鼠标点击来操作了,非常简单
在点击xml文件中左上角的+号,将刚刚创建的2个
Fragment拖进来,之后的样子会是如下图所示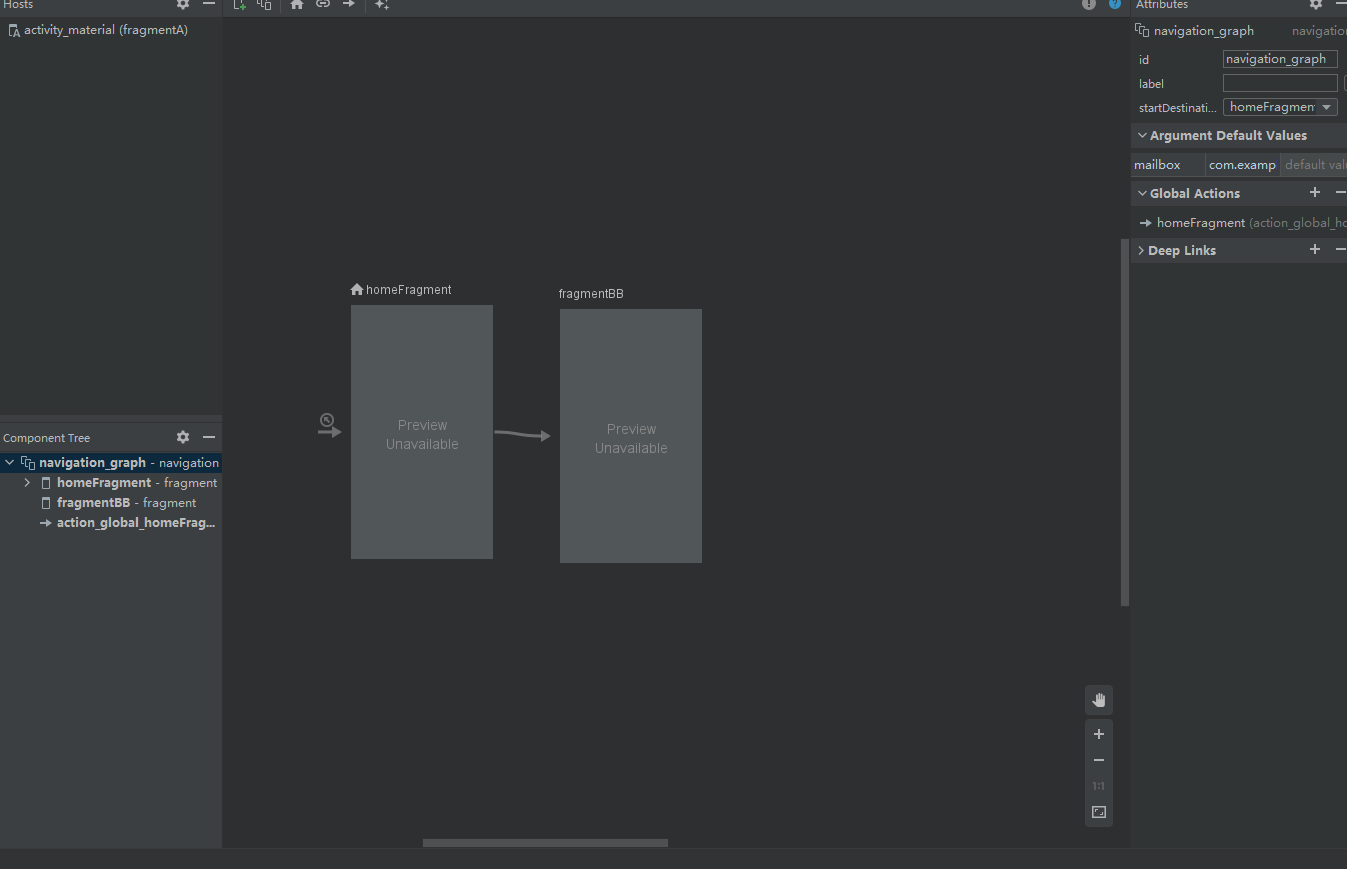
当然你们肯定是还没有连线的,接下来就将它们联系起来
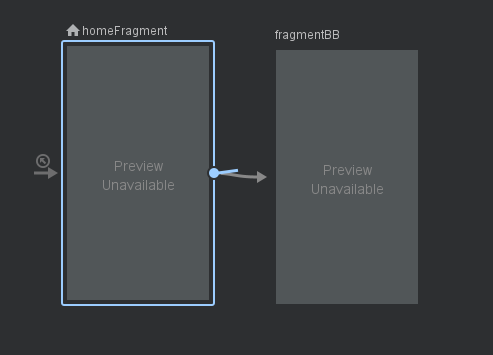
选中右边的一侧,拖至另一个Frag
ment,就联系上了最后在
xml文件的Split代码页面中,给第一行的navigation添加上开始页面1
2
3
4
5
6
7
8<navigation xmlns:android="http://schemas.android.com/apk/res/android"
xmlns:app="http://schemas.android.com/apk/res-auto"
android:id="@+id/navigation_graph"
app:startDestination="@id/homeFragment"> //《---这里
....
</navigation>在
MainActivity的xml中,添加一个FragmentContainerView,将上面创建好的navigation添加上去1
2
3
4
5
6
7
8
9
10
11
12
13
14
15
<androidx.coordinatorlayout.widget.CoordinatorLayout xmlns:android="http://schemas.android.com/apk/res/android"
xmlns:app="http://schemas.android.com/apk/res-auto"
android:layout_width="match_parent"
android:layout_height="match_parent">
<androidx.fragment.app.FragmentContainerView
android:id="@+id/fragmentA"
android:name="androidx.navigation.fragment.NavHostFragment"
android:layout_width="match_parent"
android:layout_height="match_parent"
app:defaultNavHost="true"
app:navGraph="@navigation/navigation_graph" /> //《--这里
</androidx.coordinatorlayout.widget.CoordinatorLayout>NavHostFragment是导航视图的展示容器(name为固定写法,必须指明为)
defaultNavHost字段表示是否拦截返回按键操作(若为true,需要的Activity中重写onSupportNavigateUp方法。 因为默认情况下返回键是不会回退fragment页面的)
就大功告成拉,打开软件,先是会显示
FragmentA。你可以在FragmentA中添加一个按钮,通过如下代码进行跳转1
2
3button.setOnClickListener {
Navigation.findNavController(it).navigate(R.id.action_fragmentA_to_fragmentB)
}这里的R.id.action_fragmentA_to_fragmentB是刚才navigation中FragmentA的action定义的
1
2
3<action
android:id="@+id/action_fragmentA_to_fragmentB"
app:destination="@id/fragmentBB" />通过指定
action的id来告诉Navigation跳转的逻辑。其他页面也是一样
Materal共享属性动画
接下来才是重点,在Materal Design中提供了容器变换、共享轴模式、淡出淡入、弹出这些转场模式
这里就可以使用navigaion+容器变换来实现非常炫酷的转场动画
Materal依赖
Materal动画是需要Materal依赖
1 | implementation 'com.google.android.material:material:1.4.0' |
Materal转场动画使用
我们接着上面的项目继续更改
将
FragmentA继续完善将
FragmentA的布局改为RecyclerView,做成列表1
2
3
4
5
6
7
8
9
10
11
12
13
14
<androidx.constraintlayout.widget.ConstraintLayout xmlns:android="http://schemas.android.com/apk/res/android"
android:layout_width="match_parent"
android:layout_height="match_parent"
xmlns:app="http://schemas.android.com/apk/res-auto">
<androidx.recyclerview.widget.RecyclerView
android:id="@+id/ma_list"
android:layout_width="match_parent"
android:layout_height="match_parent"
app:layout_constraintLeft_toLeftOf="parent"
app:layout_constraintTop_toTopOf="parent" />
</androidx.constraintlayout.widget.ConstraintLayout>添加
navigation插件1
2
3
4apply plugin: 'com.android.application'
apply plugin: 'kotlin-android'
//...
apply plugin: "androidx.navigation.safeargs.kotlin"完善
FragmentA代码(关于适配器的内容,我就不介绍了,就只是做个列表出来用于跳转而已)1
2
3
4
5
6
7
8
9
10
11
12
13
14
15
16
17
18
19
20
21
22
23
24
25
26
27
28
29
30
31
32
33
34
35
36
37
38
39
40
41class FragmentA : Fragment() {
private val binding: FragmentABinding by lazy { FragmentABinding.inflate(layoutInflater) }
private val adapter: MaterialAdapter by lazy { MaterialAdapter() }
override fun onCreateView(
inflater: LayoutInflater,
container: ViewGroup?,
savedInstanceState: Bundle?
): View {
return binding.root
}
override fun onCreate(savedInstanceState: Bundle?) {
super.onCreate(savedInstanceState)
enterTransition = MaterialFadeThrough().apply {
duration = 300.toLong() // 设置过度时间
}
binding.maList.run {// 正常的设置适配器
adapter = this@FragmentA.adapter
layoutManager = LinearLayoutManager(context)
}
adapter.run {// 适配器的点击事件
addChildClickViewIds(R.id.ma_root)
setOnItemChildClickListener { adapter, view, position ->
val transitionName = "fragmentB"// 共享元素的Transition名称
val extras = FragmentNavigatorExtras(view to transitionName)
val directions =
FragmentADirections.actionFragmentAToFragmentB((adapter.data[position] as Int).toLong())
val navHostFragment =
activity?.supportFragmentManager?.findFragmentById(R.id.fragmentA) as NavHostFragment
val navController = navHostFragment.navController
navController.navigate(directions, extras)
}
}
adapter.setList(arrayListOf(1, 2, 3, 4, 5, 6, 7, 8, 9, 10, 11, 12, 13, 14, 15))
}
}enterTransition:进入别的场景时的过度
FragmentNavigatorExtras:使用给定的共享元素实例
directions:动作,就是表明要跳到哪里
findNavController():扩展函数,用于获取NavController
FragmentB代码部分1
2
3
4
5
6
7
8
9
10
11
12
13
14
15
16
17class FragmentB : Fragment(){
...
override fun onCreate(savedInstanceState: Bundle?) {
super.onCreate(savedInstanceState)
sharedElementEnterTransition = MaterialContainerTransform().apply {
// drawingViewId 是视图的 id,在其上方,容器变换将在 z 轴空间进行
drawingViewId = R.id.fragmentA
duration = resources.getInteger(R.integer.reply_motion_duration_large).toLong()
// 由于我们也想将列表页面通过动画转换出视图,所以将 scrimColor 设置为透明
scrimColor = Color.TRANSPARENT
setAllContainerColors(requireActivity().themeColor(R.attr.colorSurface))
}
}
}sharedElementEnterTransition:设置将用于共享元素转移到内容场景的过渡
这里的R.id.fragmentA是MainActivity布局中的FragmentContainerView
之后就可以启动看一下效果了,不出意外的话,效果会于下图一致(Gif图的速度会过快)
官方效果